How to Install Jupyter Notebook on Centos 8 and Use Vim In It
First, update the CentOS 8 package repository cache with the following command.
sudo dnf makecacheInstall Python3 and neccessary build tools with the following command.
sudo dnf install gcc python3-devel
Check if you have Python 3 installed and working.
python3 --version
Python 3.6.8
OK now let us install the Jupyter notebook.
pip3 install --user --no-cashe-dir jupyter
If you have already installed Jupyter notebook, run following command to install the latest version.
pip3 install --upgrade --force-reinstall --no-cache-dir jupyter
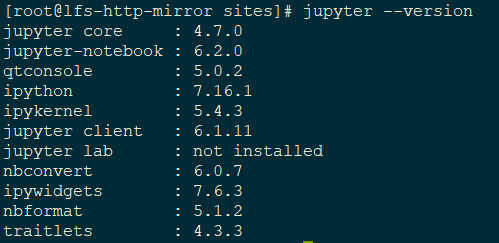
Run following command to make sure Jupyter is installed.
jupyter --version

Now we are ready to start the Jupyter notebook. Run following command. Note you can skip --allow-root switch, if you are not runnnig as root user.
jupyter notebook --no-browser --allow-root

Jupyter Notebook Password
As we see above, Jupyter notebook generates a token, which acts like a password. Rather using this default token, we can set up our own password. To do that let us first create a directory ~/.jupyter which will contain the Jupyter config file and the password.
test -d ~/.jupyter || mkdir ~/.jupyter
Now run command "jupyter notebook password" and set your password.
jupyter notebook password

Now run command jupyter notebook --no-browser (--allow-root is not needed, if you are not root). As we see below, the token is not part of the URL anymore. Now go to URL http://localhost:8888/ and add your password when prompted.

Jupyter Notebook Access Remotely
As we see above, by default Jupyter starts the notebook on localhost and on port 8888. Of course we can change that if you want to run the notebook on external IP and access it remotely.
Rerun the jupyter notebook command with additional switches for IP and Port as shown below.
jupyter notebook --no-browser --ip=192.168.20.129 --port=8888
Let us open the port 8888 so that you can access the notebook remotely. Run following two commands to do that.
sudo firewall-cmd --add-port=8888/tcp --permanent
sudo firewall-cmd  --reload
Configuring Jupyter Notebook Using Configuration File
Jupyter notebook can be configured using a Json config file. This config file needs to be in ~/.jupyter directory which we have created above.
Vi the file ~/.jupyter/jupyter_notebook_config.json and make sure your configuration looks something like this...
{
"NotebookApp": {
    "password": "argon2:$argon2id$v=19$m=10240,t=10,p=8$VJJruXbeJMCLuDxIqDKCpw$ilXDgmk+esfuhDuHj0dx9g",
    "ip": "127.0.0.1",
    "port": 8888,
    "notebook_dir": "/home/notebooks",
    "open_browser": false
}
}
All the settings will be invoked from the ~/.jupyter/jupyter_notebook_config.json. Create the /home/notebooks, if you are following mine settings exactly. Now start your notebook simply using following.
jupyter notebook
How To Enable Vim on Jupyter Notebook
To enable Vim on Jupyter, Install the Jupyter Vim bindings.
# Create required directory in case (optional)
mkdir -p $(jupyter --data-dir)/nbextensions
# Clone the repository
cd $(jupyter --data-dir)/nbextensions
git clone https://github.com/lambdalisue/jupyter-vim-binding vim_binding
# Activate the extension
jupyter nbextension enable vim_binding/vim_binding
Now restart your Jupyter notebook and open a new notebook in the browser, You would see Vim mode enabled.
Check out more on Vim in Jupyter notebook here...
Related Notebooks
- How To Install Python TensorFlow On Centos 8
- How To Install R Sparklyr H2O Tensorflow Keras On Centos
- How To Run Code From Git Repo In Collab GPU Notebook
- How To Use Grep In R
- How To Install Python With Conda
- How To Use Python Pip
- How To Add Regression Line On Ggplot
- How To Use Pandas Correlation Matrix
- How To Use R Dplyr Package
- How To Use Selenium Webdriver To Crawl Websites